


How to install aluminum pool fence
 Aug 24, 2026|
 View:167
Did you know that 75% of fatal child drownings involve children under age five? A secure barrier around your pool provides peace of mind for families with kids or pets. Princeton Metal's modern aluminium pool fencing—crafted as a premium aluminum pool fence—offers exceptional quality, corrosion resistance, and a sleek design that enhances any backyard.
This guide walks you through a complete DIY installation process for your aluminum pool fence, from planning to final inspection. You'll learn measuring, post setting, panel attachment, and gate installation. We emphasize safety and code compliance throughout.
Statistic | Value |
|---|---|
Risk reduction from four-sided isolation fencing | 83% |
Incidents occurring during non-swim time | 70% |
Always check local building codes and obtain necessary permits before starting any aluminum pool fence installation.
Key Takeaways
Check local building codes and obtain permits before starting your fence installation.
Set posts below the frost line. Use wet concrete for maximum stability.
Install a self-closing, self-latching gate that opens outward from the pool.
Inspect gaps under and between panels to ensure they meet safety requirements.
Aluminum fences resist rust and need only occasional washing. They last 30 years.
Planning Your Aluminum Pool Fence Installation
Before you dig a single hole, you need a precise plan. Start by checking your property lines and local regulations. Many jurisdictions require a specific setback from the property boundary. You also need to know the required distance between the fence and the pool's edge.
The measurement datum varies by jurisdiction. Some codes measure from the water's edge; others measure from the pool shell, the coping, or the outermost deck edge. Confirming the local definition before preparing a site plan prevents placement errors that would require costly redesign.
Requirement
Value
Pool to property line
5 feet
Pool fence to pool water's edge
at least 3 feet
Pool fence to property line
no closer than 2 feet
Note: These are example requirements from one jurisdiction; actual regulations vary by location.
Measuring the Perimeter and Marking Post Locations
Accurate measurement forms the foundation of your entire project. Use a tape measure or measuring wheel for this task. Follow these steps:
Start at one corner of the pool with a tape measure or measuring wheel.
Run the tape along the exact line where panels will sit, including decking or patio edges.
Stop at the next corner, record that length, and continue until you return to the starting point.
Add 2–3 feet of extra footage per gate location for framing and latch installations.
Round up by 5%–10% to account for post spacing tolerances and out-of-plumb adjustments.
For kidney or freeform pools, break the perimeter into straight segments. Measure each section individually, then add them together. Curved runs may require additional post collars or flexible bracketry.
According to manufacturer guidance, posts should be spaced 72.5 inches apart, center to center. This measurement accommodates standard six-foot panels and ensures panels fit correctly without gaps. Mark each post location with spray paint or stakes.
Gathering Tools, Materials, and Choosing Your Fence Style
You will need specific tools for this project. A post hole digger or auger creates clean holes. A level and string line maintain straight lines and even heights. You also need concrete mix, a drill, and protective gear.
For pool fence installation on concrete surfaces, a hammer drill with masonry bits is essential – a standard cordless drill will not work.
Princeton Metal offers modular panel sizes and custom configurations to fit any pool area layout. Choose a finish that complements your home's exterior. Black suits traditional and contemporary homes. White creates a coastal, cottage style. Bronze adds warmth to earth-tone palettes. Custom colors are also available. All aluminum finishes resist rust and require minimal maintenance, making your aluminum pool fence a lasting investment.
Setting Posts for Your Pool Fence
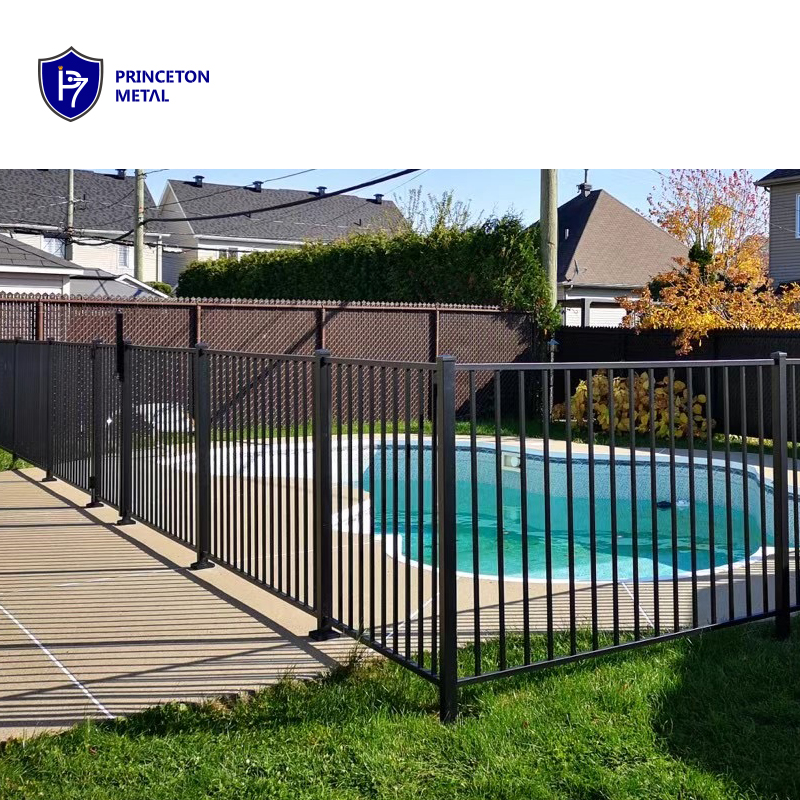
The posts form the backbone of your entire aluminum pool fence. Getting them set correctly determines whether your fence stands straight for decades or leans within a few seasons. This phase requires patience and precision. You will dig holes, mix concrete, and position each post with care.
Digging Post Holes to the Correct Depth
Start by digging each hole to the proper depth. The standard recommendation for a steel post with a 2⅜-inch outside diameter calls for a hole diameter of 8 to 10 inches. The minimum depth ranges from 24 to 30 inches. These dimensions give your post enough surface area for concrete to grip firmly.
Your local frost line changes these numbers significantly. The frost line marks how deep the ground freezes during winter. Posts must extend at least 6 inches below this line to prevent frost heave. Frost heave occurs when moisture in the soil freezes and expands, pushing posts upward each winter. Over time, this movement causes leaning, gapping, and structural failure.
Region | Maximum Frost Depth | Required Post Depth |
|---|---|---|
Southern US (FL, TX) | 0-6 in | 24-30 in |
Mid-Atlantic (VA, NC) | 12-18 in | 24-30 in |
Midwest (OH, IN) | 30-36 in | 36-42 in |
Northern Plains (MN, ND) | 48-60 in | 54-66 in |
Northeast (ME, VT) | 48-54 in | 54-60 in |
Mountain (CO, MT) | 36-60 in | 42-66 in |
Consider Columbus, Ohio, where the frost line sits at approximately 32 inches. Your posts must reach at least 32 inches deep to clear that line. Check your local building department for the exact frost depth in your area. This information ensures your aluminum pool fence remains stable through every season.
Use a post hole digger or power auger for clean, straight holes. Remove loose soil from the bottom and sides. Tamp the bottom firmly to create a solid base. If you encounter rocky soil, remove large stones and backfill with compacted dirt before pouring concrete.
Setting Posts in Concrete for Maximum Stability
You have two options for setting posts: the wet pour method or the dry pour method. Choose the wet pour method every time. Wet mixing ensures consistent hydration throughout the concrete. This creates a stronger bond around the post and provides long-term stability. Dry pour risks uneven hydration, which produces weak concrete and allows post movement.
Mix your concrete according to the manufacturer's instructions. Aim for a consistency similar to thick oatmeal. Pour the concrete into the hole around the post. Use a shovel or stick to poke the concrete and remove air pockets. Air pockets weaken the concrete and reduce its holding power.
Position each post with a level before the concrete sets. Check both vertical planes. Use temporary braces to hold the post perfectly plumb while the concrete cures. Standard concrete requires 24 to 48 hours of cure time before you attach panels. Fast-setting concrete firms up within 20 to 40 minutes, but full structural strength still develops over 24 to 48 hours. Leave your braces in place overnight for the best results.
Princeton Metal's lightweight aluminum posts make this process easier. You can lift and position each post without heavy equipment. The reduced weight also simplifies adjustments while the concrete is still wet.
For installations on existing concrete surfaces, you need a different approach. Use a surface-mount base plate system. Follow these steps:
Position the post with a welded base plate or separate mounting bracket on the concrete surface.
Mark and predrill holes through the base plate into the concrete.
Insert concrete anchors through the predrilled holes.
Tighten the anchors to secure the base plate to the concrete.
Ensure the concrete is sound and use correct anchor spacing and edge clearances to prevent loosening over time.
The base plate sits flat on the concrete. Anchor bolts pass through the plate and into the concrete below, locking everything in position. The fence post connects to this plate through a steel-to-steel connection. This method works well for patios and low-impact applications. The base plate stays largely hidden once you install the fence panels.
Attaching Panels and Installing the Gate
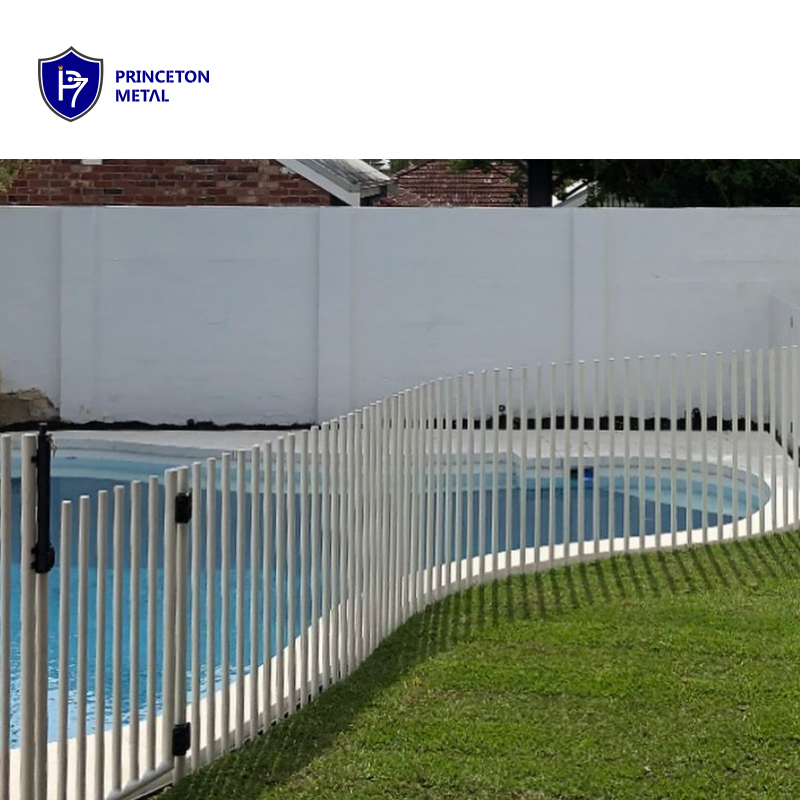
With your posts set and cured, you can now attach the fence panels. Princeton Metal's fencing features precise picket spacing that meets safety regulations to prevent children from slipping through. The modular panels slide between posts and secure with brackets. You will need a level, shims, and a drill for this phase.
Securing Fence Panels to Posts
Start by positioning the first panel between two posts. Rest the panel on the concrete or ground, then check its height. Most installations place the bottom of the panel 2 inches above the finished grade. This clearance prevents moisture buildup while maintaining safety compliance.
Most pool safety codes require a maximum opening of 4 inches between pickets and no more than 2 inches of clearance under the barrier. Princeton Metal's panels meet these specifications out of the box.
Hold the panel against the post faces. Use a level to verify the panel sits perfectly vertical. Place shims between the panel rail and the post where needed. Shims correct minor variations in post spacing or concrete height. Tighten the mounting brackets with your drill, but leave them slightly loose. This allows you to make final adjustments after installing all panels.
Work your way around the perimeter. Install each panel the same way, checking level and plumb at every connection. After you set all panels, return to the first one. Tighten every bracket fully. Verify each panel remains level after final tightening. A panel that shifts during tightening needs a shim adjustment.
Installing the Gate, Hinges, and Self-Latching Mechanism
The gate demands the most attention. Most local codes require a self-closing, self-latching gate that opens outward from the pool area. This direction prevents children from pushing the gate open from inside the pool. You will install the gate frame, attach hinges, and set the latch mechanism.
Requirement | Minimum Specification |
|---|---|
Barrier height | 48 inches (4.0 feet) |
Max opening in pickets, panels, gates | 4 inches (0.33 feet) |
Max clearance under barrier | 2 inches (0.17 feet) |
Max decorative cutout opening | 1.75 inches (0.15 feet) |
Gate swing direction | Outward, away from pool |
Self-closing and self-latching | Required for all gates |
Latch release placement | High enough or on pool side to prevent child access |
Mount the gate hinges on the post first. Use the included hardware and follow the manufacturer's torque specifications. Attach the gate panel to the hinges. Check the gap between the gate and the adjacent panels. A consistent 1/4-inch gap allows smooth operation without creating a safety hazard.
According to FenceTrac, virtually all municipal pool fencing codes share two non-negotiable gate requirements:
Automatic Self-Closing: The gate must close and latch on its own every time you release it from any open position. Self-closing hinges apply spring tension to pull the gate shut automatically.
Positive Latching: The latch must engage every time the gate closes without manual intervention. Position it so young children cannot easily reach or operate it from the pool side.
Some jurisdictions require the latch release point at 54 inches above finished grade. Check your local code for the exact height. Install the latch on the pool side near the top of the gate. This placement keeps it out of reach from outside the barrier.
Adjust the hinge tension after installation. Follow these steps:
Inspect the gate for mechanical issues such as loose screws, sagging, or binding before adjusting tension.
Locate the hinge tension mechanism, which may be a collar with holes or a numbered dial.
Increase tension if the gate closes slowly; decrease tension if it slams shut. Adjust one hole or one dial number at a time.
Adjust both top and bottom hinges evenly to prevent twisting.
Test the gate from fully open (90 degrees), half open, and slightly open (10-15 degrees). The gate must close and latch from every position.
Most pool safety codes in the U.S. and Australia require gates to self-close and self-latch from any open position. If your gate fails this test from any angle, it is non-compliant and needs adjustment.
Your aluminum pool fence now stands complete. The panels align, the gate latches securely, and the barrier meets safety standards. Take a moment to walk the perimeter and verify every connection before moving to the final inspection phase.
Final Inspection and Safety Compliance
Your aluminum pool fence stands complete. Now you must verify every detail before calling the project done. Walk the entire perimeter with a critical eye. Check each fastener, each panel, and each gap. This final review protects your family and ensures your work passes inspection.
Checking for Gaps, Stability, and Proper Alignment
Start with the gaps. The International Swimming Pool and Spa Code (ISPSC) limits openings to 4 inches. This rule applies between pickets and under the fence. A 4-inch sphere must not pass through any opening. Measure the space between each picket with a tape measure. Check the clearance beneath the fence. On solid surfaces like concrete, the maximum gap is 2 inches. Over grass or ground cover, you may have up to 4 inches. Fill any larger gaps with permanent materials. Wire mesh or plastic netting will not pass inspection. Inspectors reject these temporary fixes because they deteriorate and detach.
Next, test the stability of every post. Push and pull each post firmly. A properly set post should not move at all. Check all mounting brackets and fasteners. Tighten any loose screws or bolts. Walk the fence line and look for panels that sit unevenly. Use a level to confirm each panel remains plumb. Small adjustments now prevent bigger problems later.
Inspection Area | Common Installation Failure | Correct Installation Standard |
|---|---|---|
Gate Operation | Hinges not self-closing; gate does not latch automatically | Install spring-loaded hardware; gate must self-close and self-latch from any open position |
Fence Height | Fence below minimum height | Add compliant extensions to meet the required minimum |
Clearance at Grade | Gaps over 2 inches on concrete or 4 inches on grass | Fill or regrade soil; secure permanent materials to block openings |
Latch Placement | Latch mounted too low, accessible to children | Reinstall latch at or above 60 inches from ground level |
Ensuring Your Aluminum Pool Fence Meets Local Codes
The ISPSC sets the baseline for pool safety. It specifies minimum fence heights of 48 inches for residential barriers. It requires self-closing and self-latching gates that swing outward. It prohibits designs that allow footholds for climbing. However, local jurisdictions adopt versions of the ISPSC with amendments. Your municipality may enforce stricter rules.
The ISPSC also limits the maximum gap at the bottom of a fence to 4 inches above grade to prevent child passage. Local jurisdictions adopt versions of the ISPSC with amendments, so the applicable code version varies by municipality.
Some states exceed the ISPSC minimums. California requires 60-inch residential fences under Health and Safety Code §115920. Arizona mandates 60 inches statewide under A.R.S. §36-1681. Florida keeps the 48-inch baseline but requires four distinct safety devices. Texas follows the 48-inch IRC baseline, yet Houston, Austin, and San Antonio adopt ISPSC locally. Check with your local building department for the exact requirements in your area. Confirm your fence height, gate hardware, and latch placement meet their standards.
Remove any climbable objects near the fence. Furniture, BBQs, trees, and overgrown hedges within 36 inches of the barrier can help children climb over. Trim vegetation and reposition items away from the fence line. Test the gate from every open position. It must close and latch on its own each time. Your completed aluminum pool fence now provides a secure, code-compliant barrier for years of enjoyment.
Installing a Princeton Metal aluminum pool fence is a manageable DIY project. Accurate planning, careful post setting, and proper gate hardware create a secure barrier. You can complete this project with the right tools and preparation.
The benefits extend beyond safety. Aluminum lasts 30 years and needs just one to two hours of annual maintenance. It resists corrosion and retains its sleek appearance. A compliant fence also adds value to your home. Appraisers view it as a mark of a well-managed property. Insurance companies often reward this proactive safety measure with lower premiums.
Enjoy the peace of mind that comes with your secure, code-compliant pool fence. For a personalized quote or to explore our range of pool fencing options, contact Princeton Metal today and transform your pool area into a secure, sophisticated oasis.
FAQ
How long does the installation take?
The installation takes a weekend for an average yard. Concrete curing requires 24 to 48 hours before you attach panels. Your total time varies with yard size and post count.
Do I need a permit for my pool fence?
Yes. Always check local building codes and obtain permits before you start. Your inspector verifies fence height, gate hardware, and clearance measurements. This step protects your family and ensures compliance.
How do I maintain the aluminum fence?
Aluminum needs minimal maintenance. Wash the fence once or twice a year with soap and water. Tighten any loose screws during your inspection. The finish resists rust and corrosion.
Can I install the fence on a sloped yard?
Yes. Princeton Metal offers modular panels and custom configurations for sloped areas. You can step panels down the slope or use adjustable brackets. Contact Princeton Metal for a tailored solution.
Will the fence rust over time?
No. Princeton Metal uses corrosion-resistant aluminum that withstands moisture, UV rays, and temperature changes. Your fence stays pristine for years with basic care.