


How to install frameless glass railing
 Aug 21, 2025|
 View:1465
Frameless glass railings have become a hallmark of contemporary architecture, offering unobstructed views, natural light penetration, and a sleek, minimalist aesthetic. Unlike traditional railings with bulky frames, these systems rely on tempered glass panels supported by discreet hardware such as spigots, clamps, or base channels. Their popularity spans residential balconies, commercial staircases, and outdoor decks, where they enhance both safety and visual appeal. However, installing frameless glass railings demands precision, adherence to building codes, and an understanding of structural requirements. This guide provides a comprehensive roadmap for achieving a professional-grade installation.
Step-by-Step Installation Method
1.Preparation and Planning
Begin by consulting local building codes to confirm height requirements (typically 42 inches for decks and balconies) and load-bearing standards. Measure the installation area accurately, accounting for glass panel dimensions and gaps between panels. For example, a 12mm-thick tempered glass panel might require an 8-inch spacing from the next panel’s edge. Use a chalk line to mark the centerline of the railing, ensuring alignment with structural supports like load-bearing walls or floors.
2.Installing Mounting Hardware
The stability of a glass railing hinges on its hardware. Spigot systems, a common choice, require drilling anchor holes into the substrate (e.g., concrete or wood decking) using a drill bit matched to the lag screw size. Place the spigot on a metal base plate, align it with the centerline, and mark anchor points. Pre-drill holes, then secure the spigot with lag screws, using Allen key adjustment screws to level it. For clamps, slide them onto the spigot after loosening the screws, set the desired height (e.g., 2¼ inches from the glass top), and tighten manually.
Alternative systems, like base channels, involve fixing aluminum tracks to the substrate with corrosion-resistant fasteners. Ensure channels are level and spaced to accommodate glass panels without bending.
3.Positioning Glass Panels
Use suction cups or lifting equipment to handle large glass panels safely. Lower each panel into the spigots or clamps, ensuring edges are polished to prevent injuries. Adjust the panels for alignment, leaving uniform gaps (e.g., ½ inch) between them for thermal expansion. For door installations, refer to manufacturer guidelines to maintain clearance and smooth operation.
4.Finalizing the Assembly
Apply high-modulus silicone sealant between glass panels and hardware to prevent water ingress and enhance stability. If using a cap rail (optional for added graspability), place it atop rubber gaskets to create a weather-tight seal. Tighten all fasteners and double-check alignment with a spirit level.
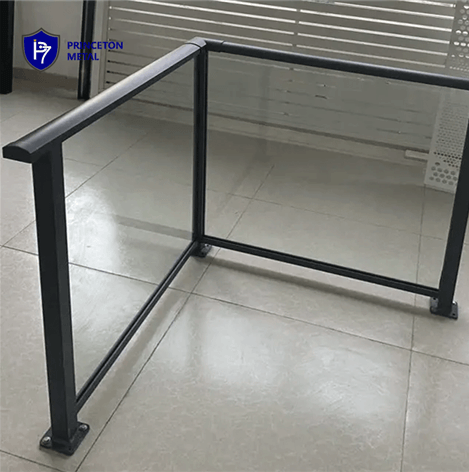
Critical Considerations and Safety Precautions
1.Structural Integrity
Frameless glass railings require robust support. Avoid installing on non-load-bearing surfaces without reinforcement. For example, a Vancouver-based system uses premium-grade aluminum and tempered glass engineered to withstand wind loads and seismic activity, meeting British Columbia’s stringent codes.
2.Glass Quality and Edge Treatment
Use only tempered or laminated glass rated for structural applications. Polished edges reduce breakage risks, while rounded corners prevent cuts during handling.
3.Weather Resistance
Outdoor installations demand hardware resistant to corrosion (e.g., stainless steel or anodized aluminum) and sealants rated for UV exposure. In coastal areas, salt-resistant coatings may be necessary.
4.Avoid Common DIY Pitfalls
Inadequate planning, such as skipping substrate reinforcement or misaligning hardware, can lead to wobbling or collapse. Always consult a structural engineer for complex projects, and prioritize safety over cost-cutting.
Conclusion
Installing a frameless glass railing transforms spaces by merging safety with sophistication. By following structured steps—from meticulous planning to precise hardware installation—you can achieve a durable, visually stunning result. Prioritize compliance with building codes, invest in high-quality materials, and leverage innovative designs like top-loading clamps to simplify the process. Whether for a residential balcony or a commercial staircase, a well-executed glass railing installation offers timeless elegance and unparalleled functionality.
For those seeking efficiency, consider systems engineered for local conditions, such as Vancouver’s Clearly Railing Systems, which combine faster installation with superior safety. With the right approach, your glass railing will stand as a testament to modern design and engineering excellence.